What is Teenblue
Teeinblue Product Personalizer is an end-to-end solution for print-on-demand personalization on Shopify.
From product design to manufacturing process, with Teeinblue you can easily set up and effectively optimize product customization in one solution.
With Teeninblue you can now:
- Add unlimited customization options to any print-on-demand product, such as text, images, street maps, star maps, clipart and more.
- Show real-time previews to customers, so they can see exactly how their products will look before purchasing.
- Sell products from the Hoplix Shopify app.
- Manage multiple stores within a single Teeinblue account, assign roles to team members, monitor order status and tracking information, etc.
What makes Teeinblue so unique and unbeatable?
- Supplier Integration: Teeinblue is not a fulfillment service, but we have integrated with the most qualified suppliers around the world via API connection. You can easily view, import their product catalog to create customizable products directly in Teeinblue.
- Order Process Control: Via API connection, you can send customized orders from Teeinblue directly to your fulfillment platform. If your provider is not integrated, you can easily fulfill orders by exporting them to CSV files, which also include the URL of the final print file.
Direct integration between Hoplix and Teeinblue now available!
How the Teeinblue app works on your Shopify store
As we said previously, Teenblue is a Shopify application.
In this article we will see how to create products on Hoplix, customize them on Teenblue and sell them on your Shopify store.
1. Create your Product on Hoplix
After signing up to Hoplix.com, create your product. It is not necessary to be precise at this stage, here we need the product as a basis, the real customization will take place on Teeinblue.
2. Import the product to your Shopify store
use this guide to know how to install the Hoplix PlixPod application on your Shopify store you will also find instructions for importing products and exporting the orders you receive from Shopify to Hoplix.
3. Install the Teeinblue Product Personalizer application on your Shopify store
Search for the Teeinblue application in the Shopify search bar and install it on your store:

4. Create your own artwork on Teeninblue
Once the Teeinblue application is installed, in the menu click on Artwork > New ArtWork
5. Insert Artwork created on your Hoplix products
In this phase you will have to insert artworks created with Teenbinblu on the products created by Hoplix and previously exported to Shopify.
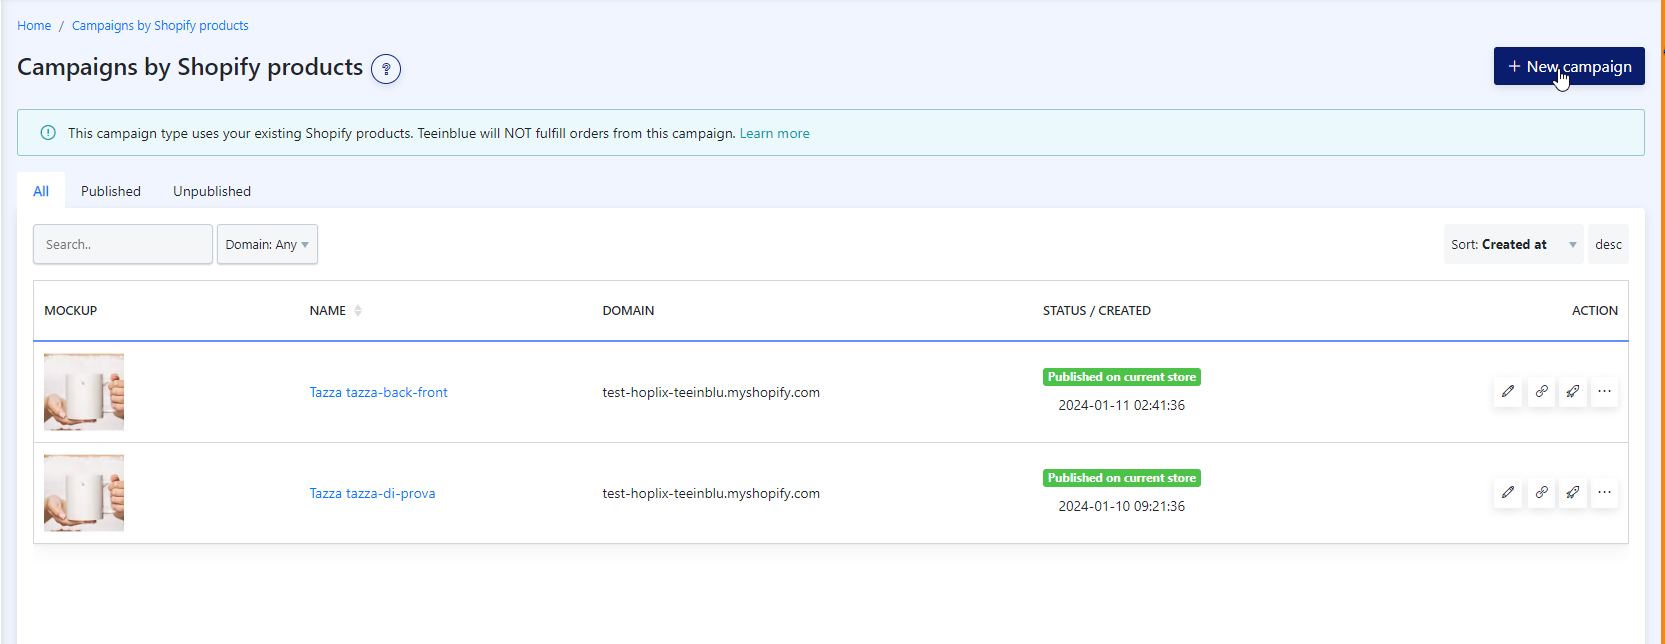
Go to Campaigns > By Shopify products > Create New Campaign
6. Select your products created on Hoplix
Click on the “New Campaign” button, select which Shopify store you imported the products to.
Once you have selected the store you will be shown the imported products
Here you will find the products you imported from Hoplix, and you can insert your creations made with TeeinBlue inside
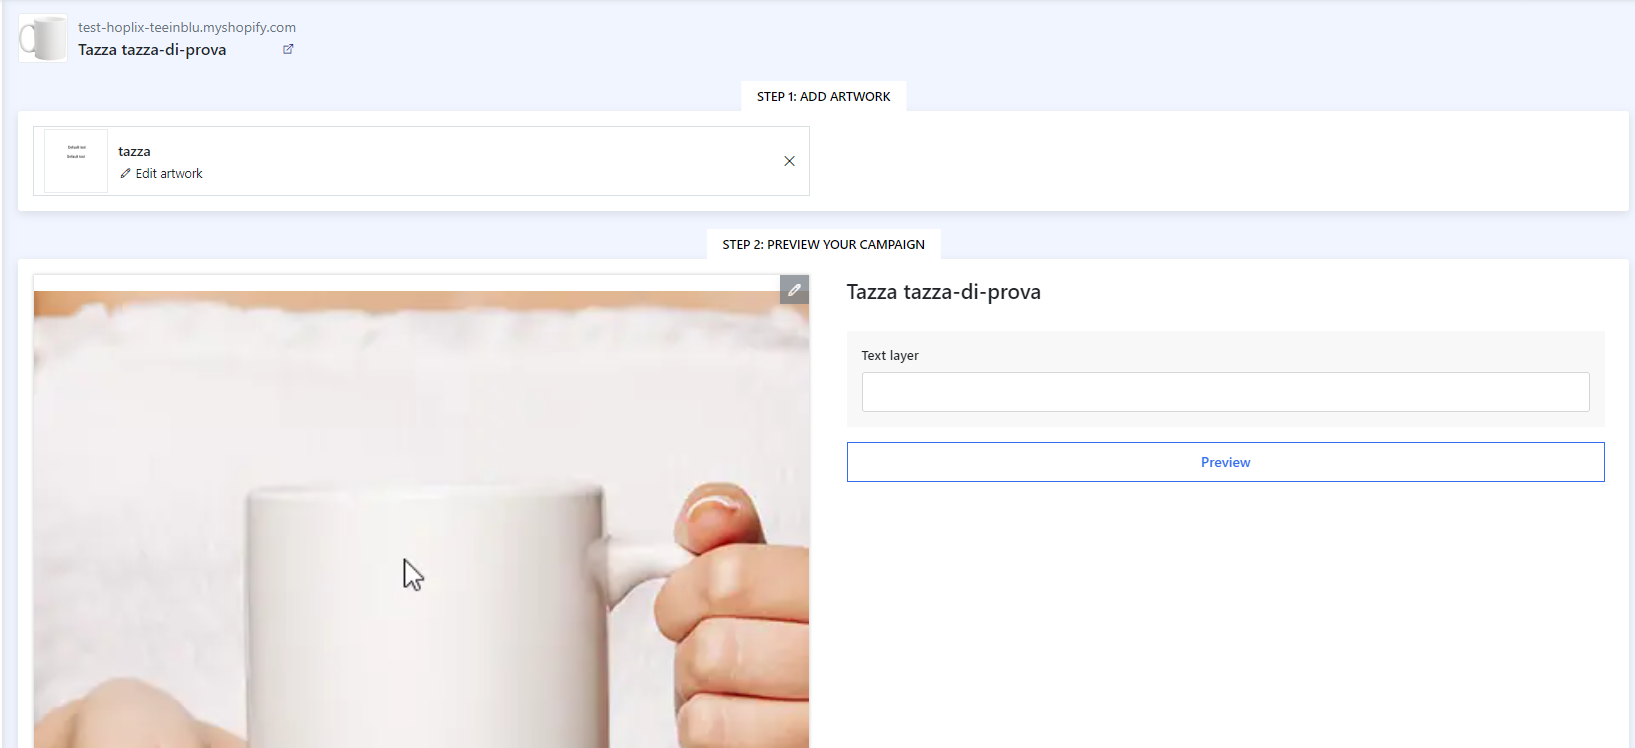
7. Apply Artwork created on Teeninblu
Select the product on which you want to apply teeninblu artwork and from the Action menu choose “Edit Campaigning” on this page you can associate the previously created artwork with the product created on Hoplix

8. Upload a Mockup to preview it
Once the Artwork has been applied, you can also upload a Mockup which will be displayed in the product sheet
9. Launch the Campaign
Click on “Launch Campaign” at the top right and you will see your creation come to life!
From now on, the product sheet will contain artwork configured on Teeninblue.
We remind you that Teeinblue is an application external to Hoplix, so for any information relating to the specific functioning of Teeinblue, you can contact their customer service within the app.
Teeinblue can also be used through CSV integration, let’s see together how it works:
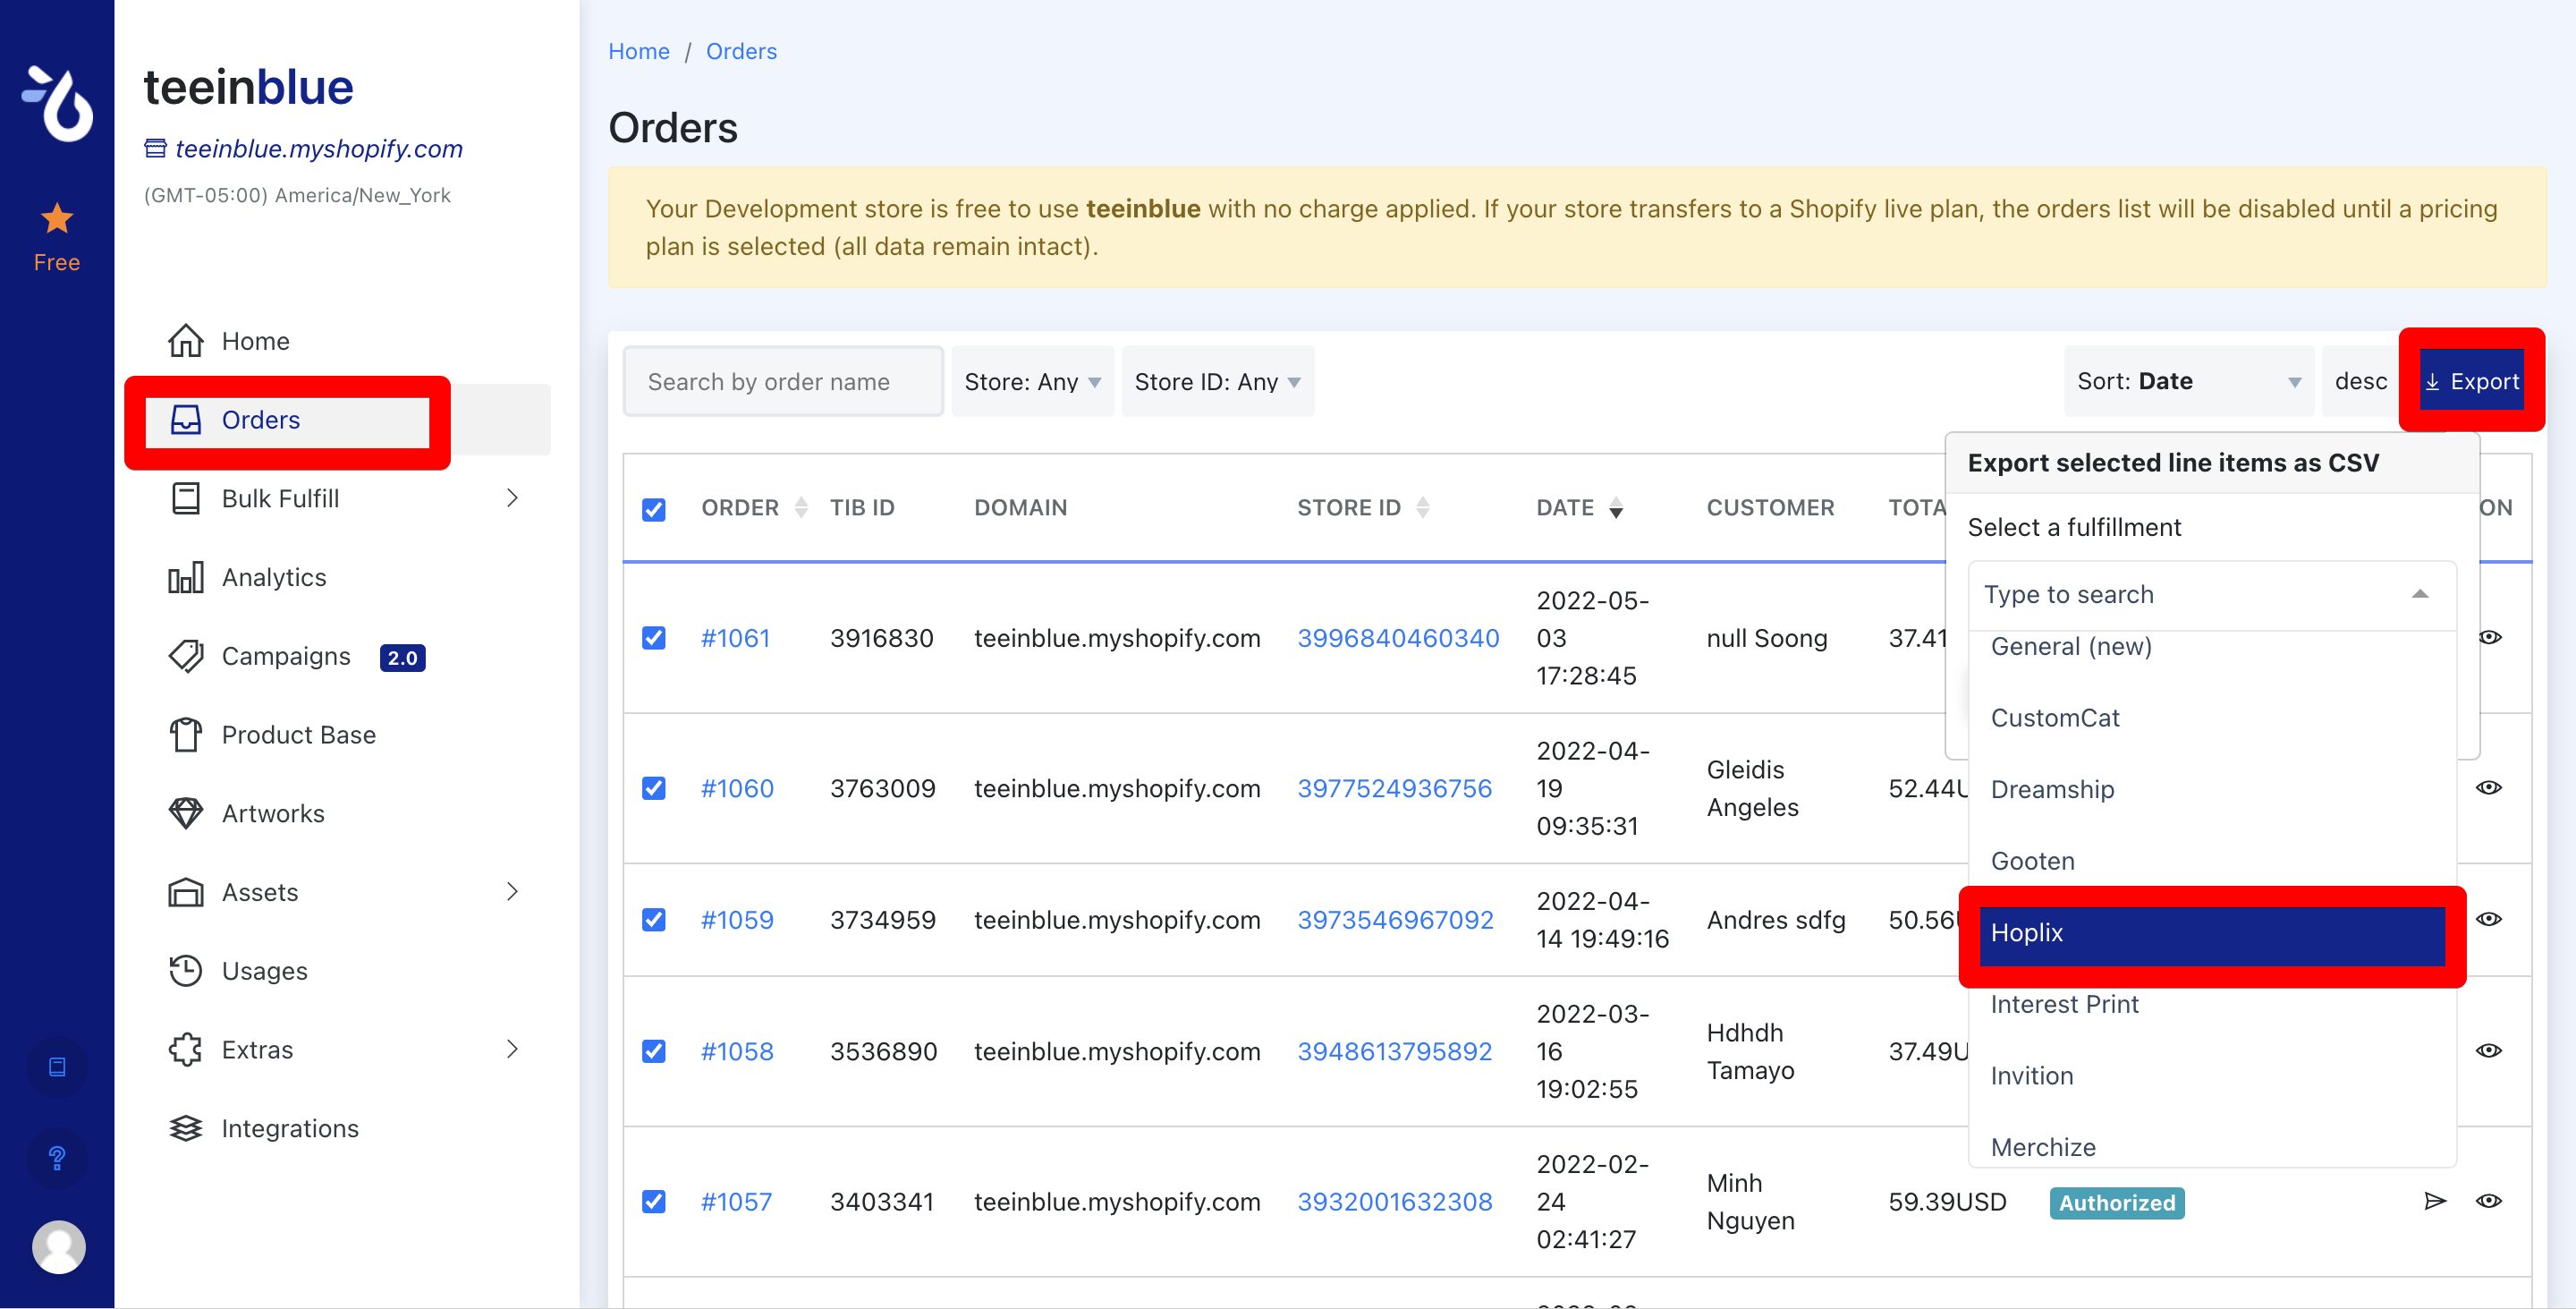
On your Teeinblue application, in the Orders section, you can export all Orders by downloading the CSV file for Hoplix.
Once you have done this, in the CSV file you will need to enter the appropriate Product-Sku for the custom product you have sold, and enter it like this:

For the uninitiated, the sku of each individual product is within the catalogue by clicking on the individual product:
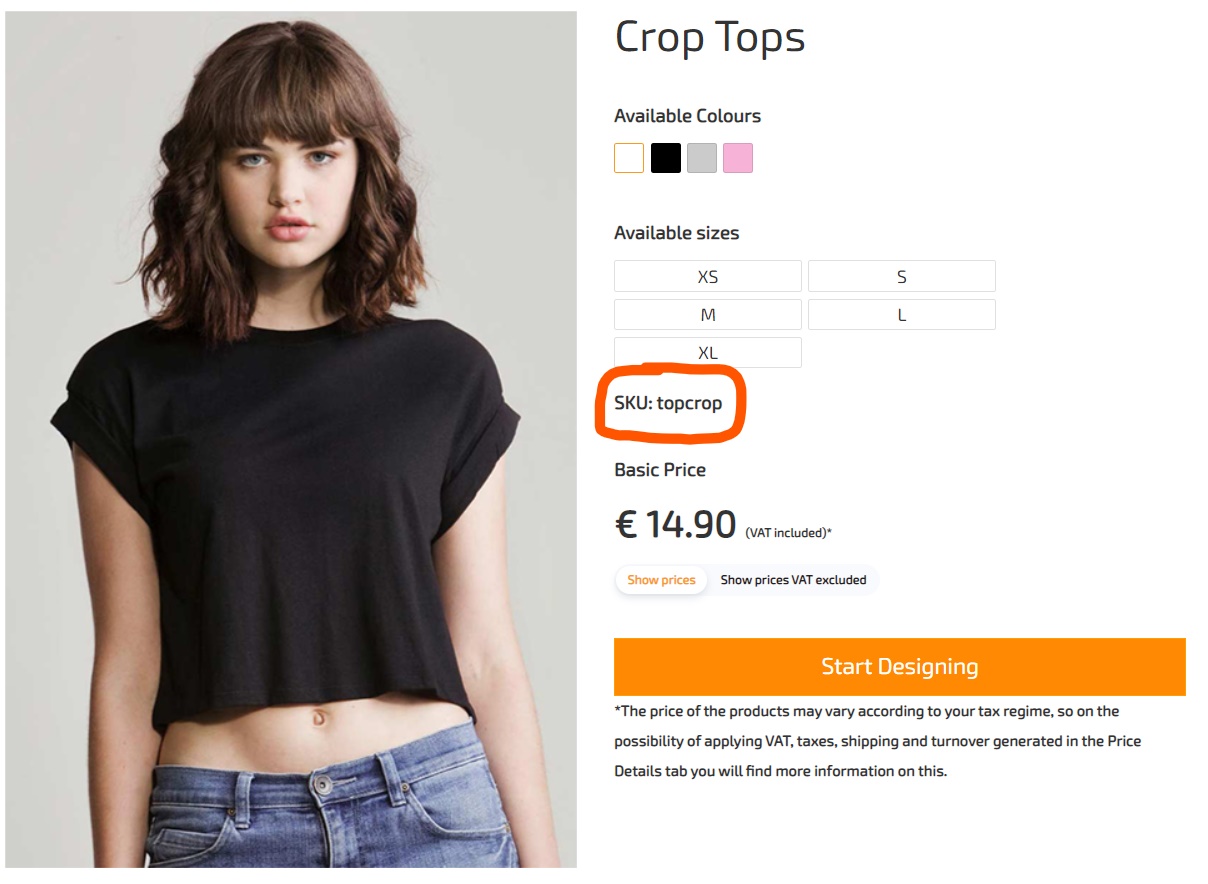
Example: In the case of an order with a Crop Top, colour Pink and size S, the Product-Sku to be entered will be: topcrop|S|pinkIf the product does not have the size and color as indicated in the Complete Product Sku that you find below, the product code becomes: white-cup|T.U.|nd
We also leave you the entire Product-Sku list of each single product Complete Product list
– The file you download from Teeinblue will look like this:
CREATE CAMPAIGN PLACE ORDER EXAMPLE (9)
You will have the link of the persoanised image within the CSV file, the only thing to be entered correctly is the Product-Sku, on which you will want to have your customer’s persoanised graphics printed.
When you have completed the CSV file correctly, you can upload it to your account > Integrations > Import CSV/XLS > Import Orders > Choose File > Import Orders in File
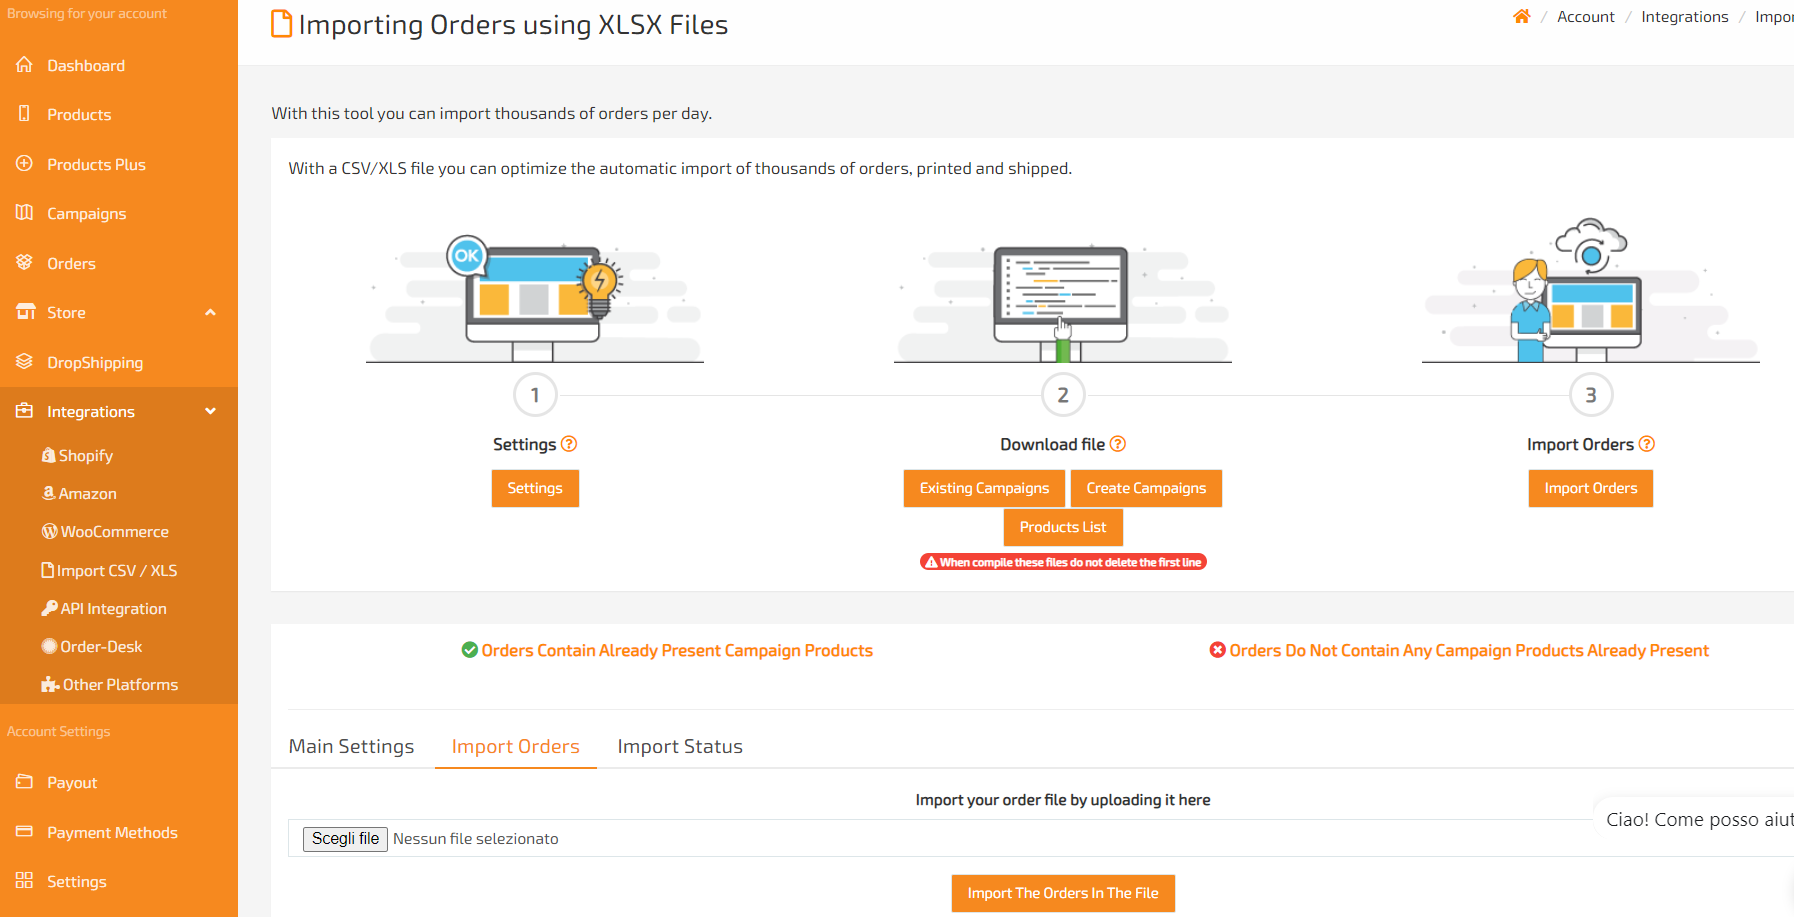
First to upload via XLS/CSV remember to activate the API keys in your account account > Settings > Api Key > Generate Api Key
Attention the file downloaded from Teeinblu has the CSV extension before uploading it to Hoplix it must be renamed in XLSX format
Now all that remains is to start the integration with Teeinblue! Happy campaigns!