Have you ever thought of being able to design your product and make it in a few easy and intuitive steps? With Hoplix everything will be very simple, even if you are a beginner in Print on Demand. With Hoplix you will have the possibility to create your online campaign in a few steps. Creating a campaign will be simple, the entire production, printing and shipping process will be entrusted to us and you just have to enjoy the results!
Creating a campaign consists of defining your product by choosing from the different categories on Hoplix. You can choose the products you want to customize, set a price and define your sales objectives in a period of time chosen by you. In addition, within the same campaign, you can insert other related products to optimize results. As a last step, you can choose your campaign name and launch it.
First step: create your product
Once you have signed up , you can click on start to create. From this simple menu, you can select product and change product. You will be able to view a list of customizable products divided by categories (clothing, mugs, jewelery etc.). Once you have chosen the category, you can select the specific product you want to customize, such as a sweatshirt.
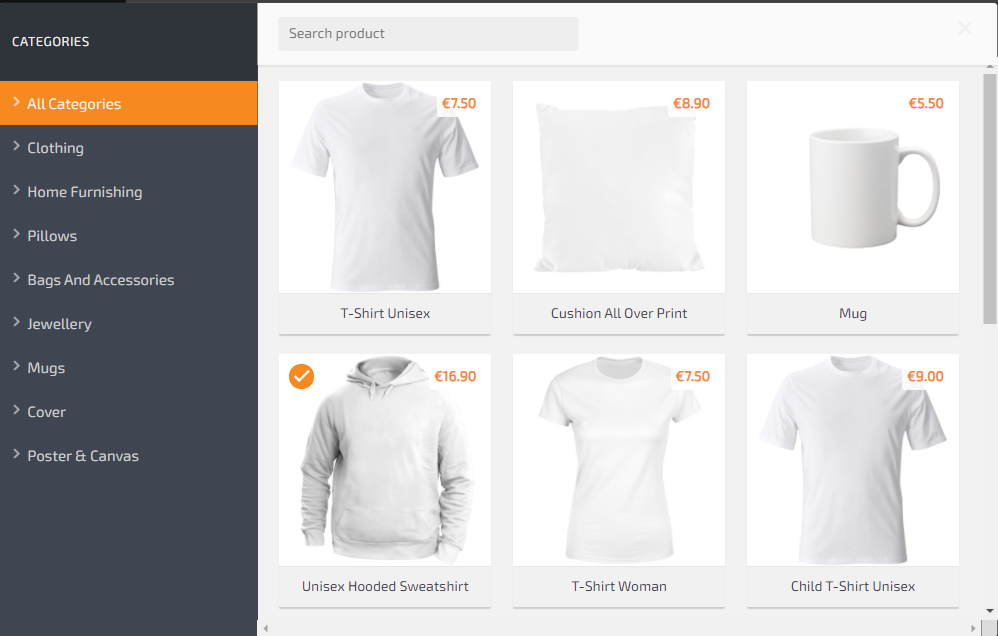
How to choose a product within a category.
Now, you can select the product color and add your personalization. Whether you want to insert your logo or your image, with Hoplix you can easily upload them by clicking on the images menu and upload your files by selecting upload. If you choose to insert a custom text, you’ll have the possibility to range between many fonts simply by selecting text and change its color and size.

Please consider that png is the ideal format for most products such as t-shirts, tank tops, sweatshirts etc. as it supports transparencies. Use the jpg format for products where transparency is not necessary (canvas, poster etc.). The image resolution should be a maximum of about 10 MB. You always follow the instructions on each product sheet.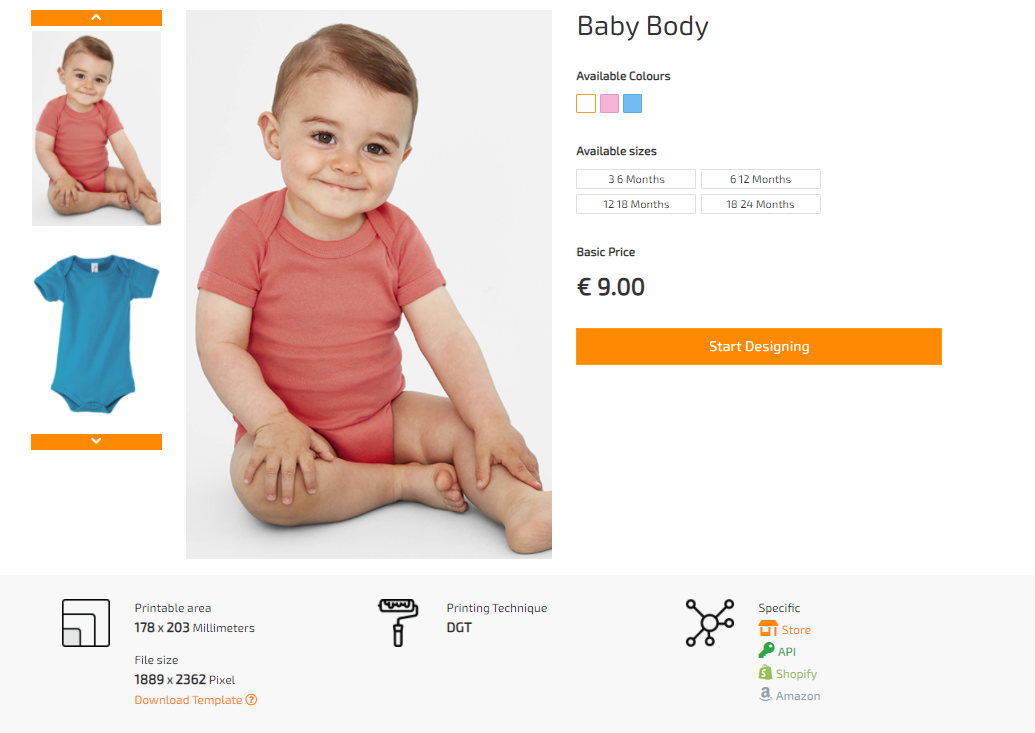
In each product sheet you’ll find the file ideal size information to be included for customization, the printable area size and the technique that will be used for printing.
Second step: define the price and sales goal
THE PROFIT MARGIN
DEFINITION OF CURRENCY AND PRICE
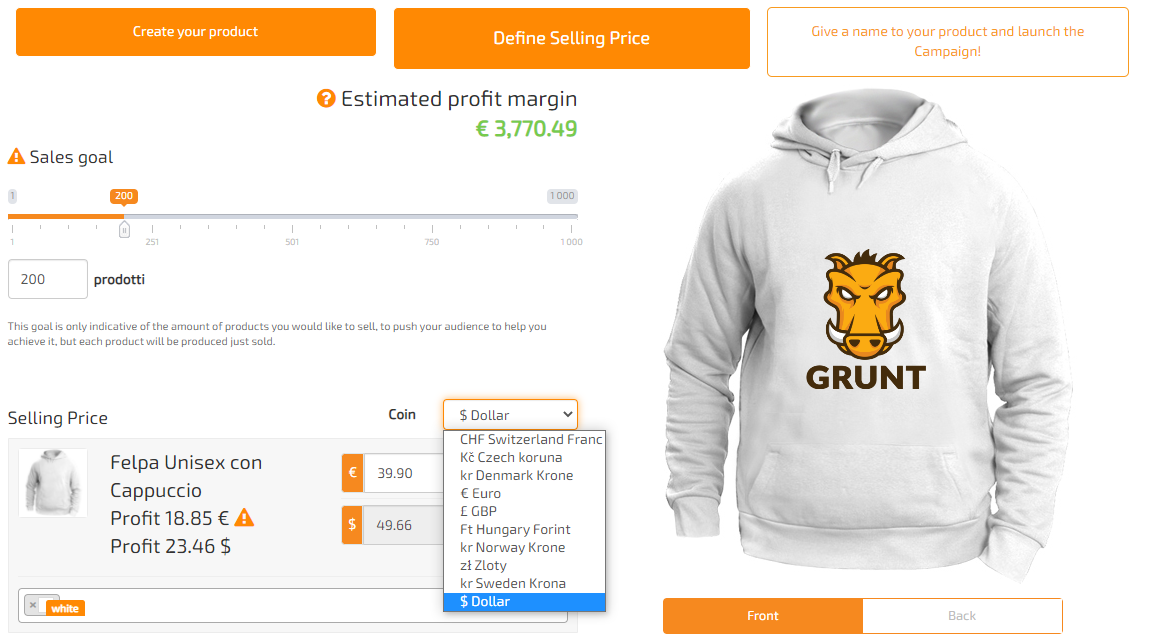
How to indicate your sales goal and estimate a profit margin and how to choose currency and price.
ADDING OTHER PRODUCTS TO THE CAMPAIGN
Through this feature, you can add related products to optimize your campaign. If, for example, you want to add to your unisex sweatshirt one or more products that are consistent and related, you can choose between: unisex tank top, woman tank top, man tank top, bag and many others. Another facility that Hoplix offers to you is the automatic and effective adaptation of your photo/logo/text on each product added to the campaign.
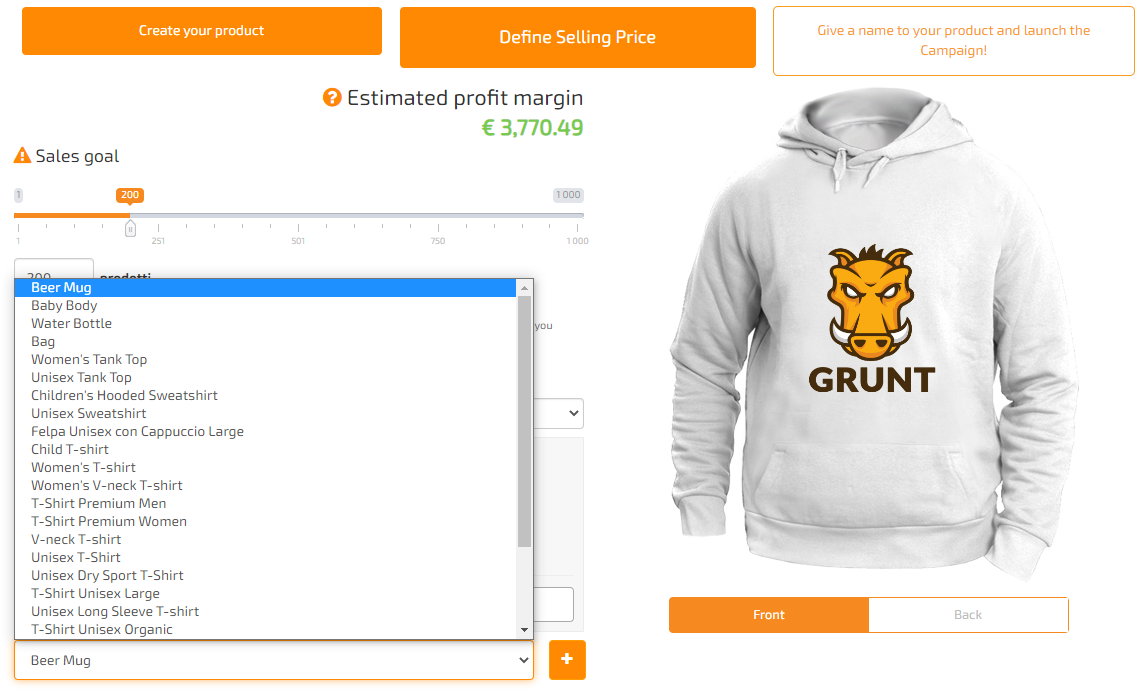
How to add other related products to your campaign.
Third step: give your product a name and launch the campaign
You are almost at the end of your campaign. Now you can decide which title to give it to make it captivating. A good title can be a short description of the campaign and its content in up to 40 characters. If you want, you can change the preset description in the dedicated panel or leave it unchanged. Regarding the technical characteristics of the specific product (for example a sweatshirt’s fabric, the washing instructions), they are predefined and cannot be changed.
At the same time, it’s possible to choose which country the campaign is aimed at. Based on your choice, the contents already present in the description box will be translated into the relevant language.
Now, you can select if to make your campaign public or private. If it’s public you have the possibility to choose its duration, from 1 to 21 days. Or, you can not set an end.
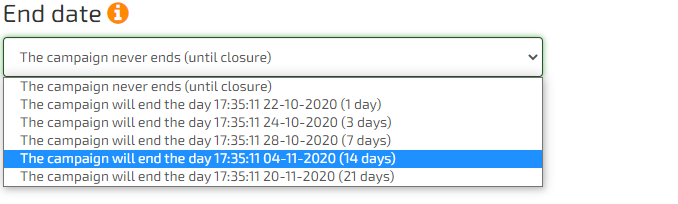
With a public campaign you’ll immediately have a sales link combined with the possibility of grouping multiple campaigns in one or more internal or external stores. In you want to make a public campaign, remember that it cannot become private. Finally, you’ll always have the possibility to stop and restart the campaign whenever you want within your personal panel. If you choose the private campaign mode, your products can be exported to your external marketplaces, to other CMS or in dropshipping mode. In private mode, a sales link will not be generated and the campaign cannot go public.
Well! You are almost at the campaign implementation process end. You just have to choose the URL. Normally, Hoplix will automatically generate it after you give your campaign a title, but you are free to modify it as you wish in the appropriate box.

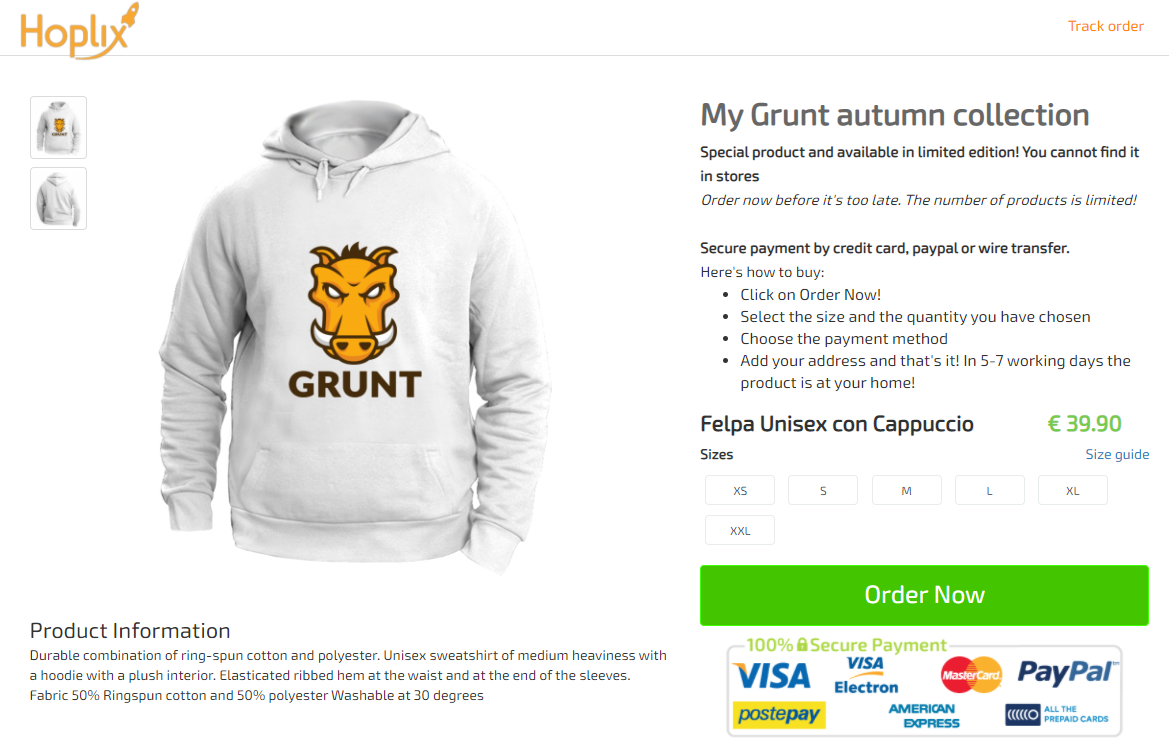
Now, you can click on launch the campaign and view it as in the image below. The campaign name, payment method informations, shipping times, price and technical characteristics of the product will be visible.
Your campaign is now complete. Are you ready to enjoy the results? Click here to view it!
Watch our video tutorial!