Welcome back! In this tutorial we will explain how to create and manage your store on Hoplix in a few simple steps. As a first step you will need to log into your personal panel and click on the top menu My Account.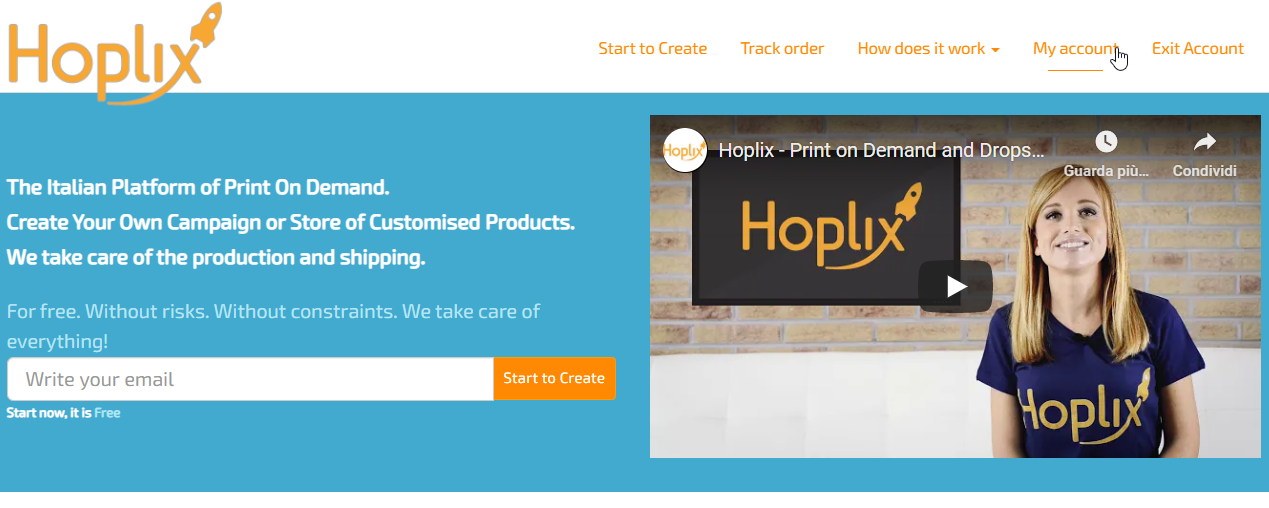
Once on the left menu, click on Store and Create/Manage. Now you will see the management panel, you can enter the name chosen for the store and view the URL. Now you can click on Create Store.

Now you can view the various functions: open or close the store and start working on it by clicking on actions. From here you can delete or modify your store.
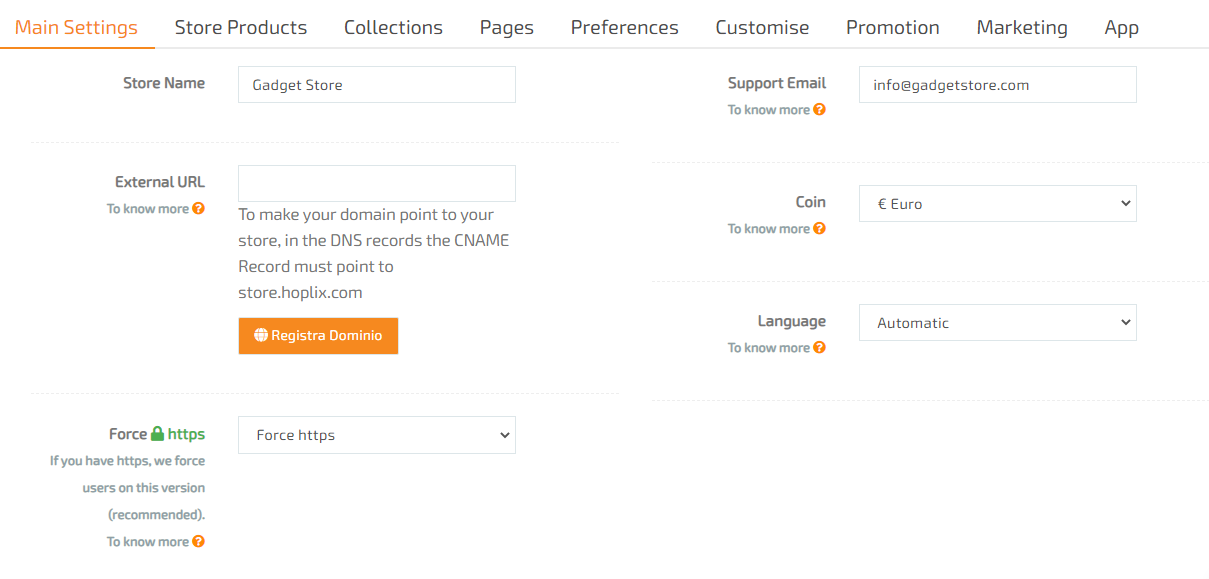
Main Settings
Well! You are now on the management panel. In this section you can insert your support e-mail for your customers, enter or register your domain if you don’t have it. You can choose the currency and the language of your store. We suggest at this stage to select force https. Clicking on Update Settings you will complete this first step.
Store Products
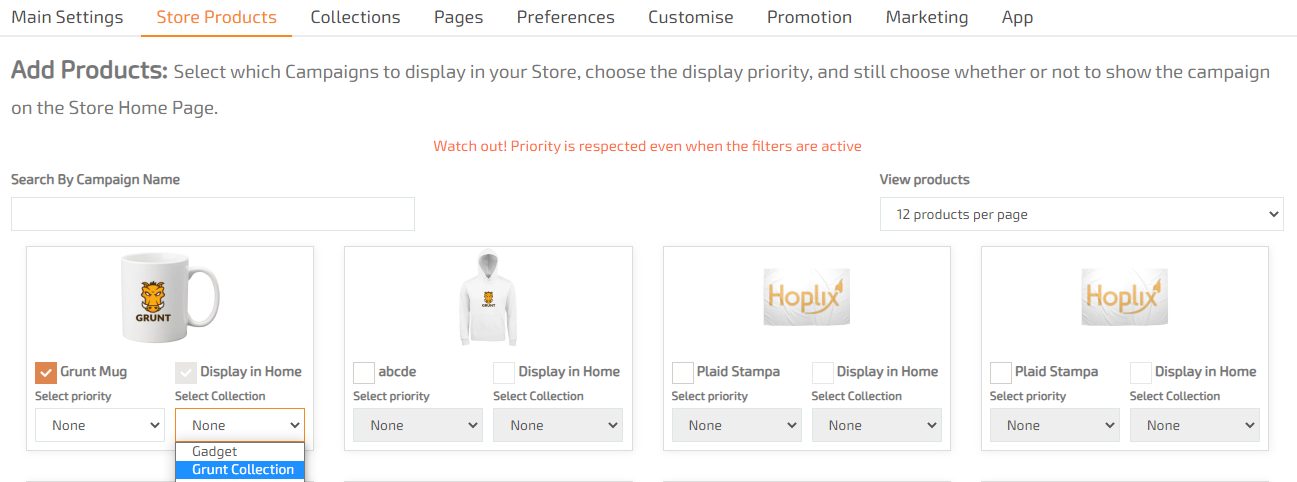
In this panel you can choose how to display your products in your store. As an example, by selecting Grunt Mug among your products, you can decide to make it appear on the home page or not, choose its priority level (from 0 to 10) and associate it with a collection or not. To do this action, you must have created collections in the Collections panel.
Collections
Creating a collection is easy. Enter its name in the Collection Name box and choose whether to make it a main collection or associate it with another collection. Once created, you can always modify or delete every single collection from this panel by clicking on Actions.
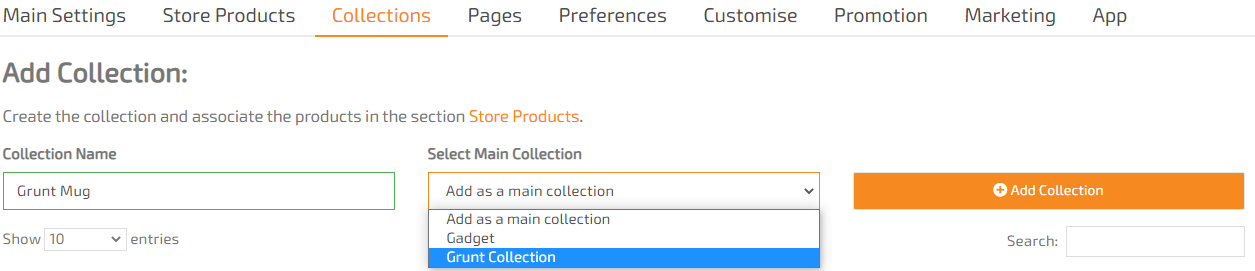
In this example, the new Grunt Mug collection becomes a sub-category of the Grunt Collection.
Pages
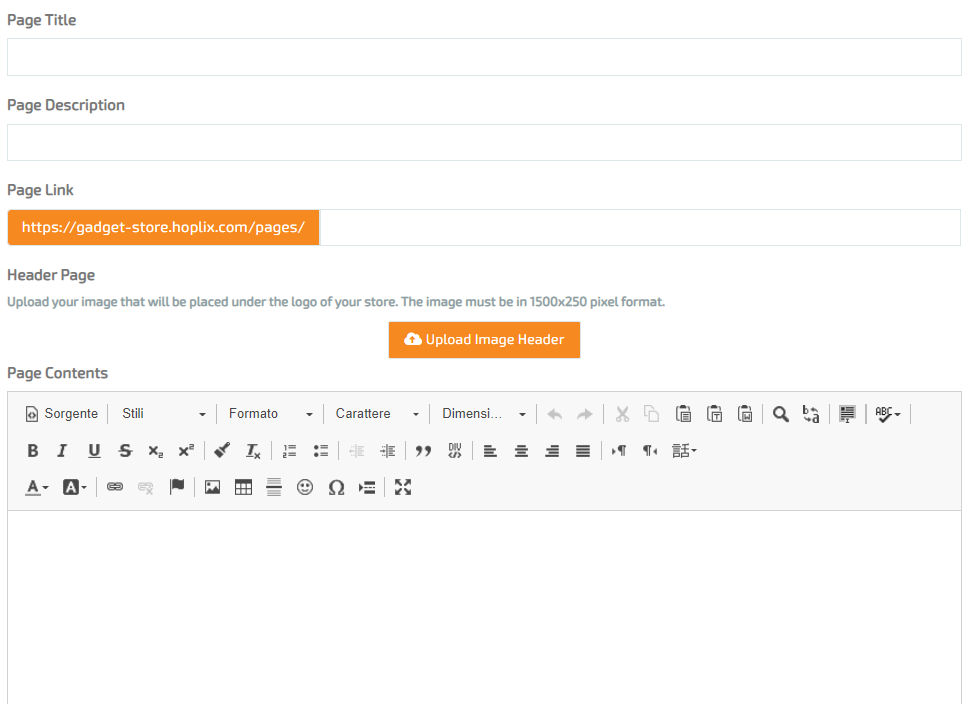
In this menu you can add new pages and give a title, description, content and image. An example of a page could be a blog or an “about us” presentation page.
Preferences
Within this panel you can customize your store.
You have many choices based on your preferences. Here we synthesize them:
Label Store Manager: here you can insert information about the store manager. These will be displayed on the Legal Information page.
Related Products: choose to display the related products in the product sheets.
Choose the View: you can decide to display your products grouped by campaign or to display individual campaigns by product type.
Menu Position: show the menu at the top or side.
Menu Type: choose to display your collections or product categories.
Show Colorus in Home Page: in this menu you can decide to display the products color variants on the home page or not.
Secondary Menu Type: you can decide to display your products in the secondary menu grouped by product categories or by collections.
Show Pages in the Menu: choose to show pages you have created.
Number of Products to Display: choose the products number to display in the store (from 10 to 30).
Show Secondary Menu: you can decide to display a secondary menu (containing product categories or collections) that will be positioned under the store header.
Show Pages in Sub Menu: you can choose to display pages you created in the sub menu.
Enable Payment by Bank Transfer to the Store: from here you can enable bank transfer payment.
Show Support Chat: choose to display our chat in your store.
Show Untracked Shipments: choose to display untracked economic shipping at checkout.
Checkout Countdown: choose to display the countdown on the checkout page.
Click the Update Preferences button to save your preferences.
Join us for the second part of this article, where we will talk about further personalizations of your store.
Watch our video tutorial!