Welcome to this second part dedicated to your store creation and personalization on Hoplix. We have examined in the part I the Main Settings, Store Products, Collections, Pages and Preferences menus. Let’s now talk about the Customize menu.
Upload Logo, Fav Icon, Header and Description
Here you can upload your logo in the box. Your logo must be 198 x 99 pixels and in PNG format. To upload it, just click inside the box and start the upload or drag the logo inside. You can change it whenever you want by clicking on the Remove File button.
Same procedure to upload your fav icon which must be 32 x 32 pixels and in PNG format. To delete it you must to click on the Remove File button.
You can also add your image to be displayed in the header. This must be 1500 x 250 pixels. Here too, deleting the image is very simple: click on the Remove File button.
In the Description box you have the possibility to enter a description of your store which will be positioned at the top of the home page.

How to Customize Menu Colors
Hoplix has default colors for your store menu but gives you the possibility to customize them according to your preferences. You can choose the color that will appear in the different parts of the store. In the Primary Colour Store and Link box, you can decide what color the links and the store will be by scrolling with the cursor on the palette or by entering the primary color you are interested in.

You can choose the color that appear when hovering over the links in Primary Colour Link to Mouse Hover box.
If you want to set a color for the store buttons, you can do it through the Button Color box. Finally, you can set a color on mouse hover on buttons using the Button colour on Mouse Hover box.
If you don’t set any preferred colors, the platform will use the default ones.
Social Network
If you want to connect your store to the social pages dedicated to it, you can insert the relative link in the boxes, remembering not to insert”http” or “https”. For example, for the Facebook page, you will insert a link like this: facebook.com/yourstorename. This procedure applies to Facebook pages, Instagram and Pinterest accounts.

Font Store
In this menu you can select, very simply, the font you want to use for your store. Just click on the drop-down menu to scroll through the various Google Font choices.

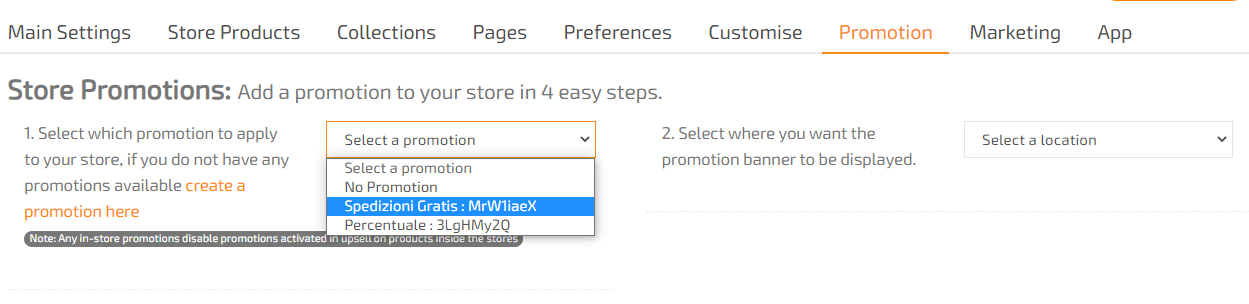
Promotions
If you’re wondering how to create a promotion, you’ve come to the right place. You can easily make them in the Promotion menu. For example, you can decide to apply a discount on reaching a certain amount, or make a discount on reaching a certain number of products ordered by the customer. Please note: the discount amount is subtracted from your margin, if the discount amount exceeds your margin it will not be possible to apply the discount to the order.

To activate a promotion, click on the drop-down menu to choose from those you have already created. To build from scratch, click on Create a Promotion Here.
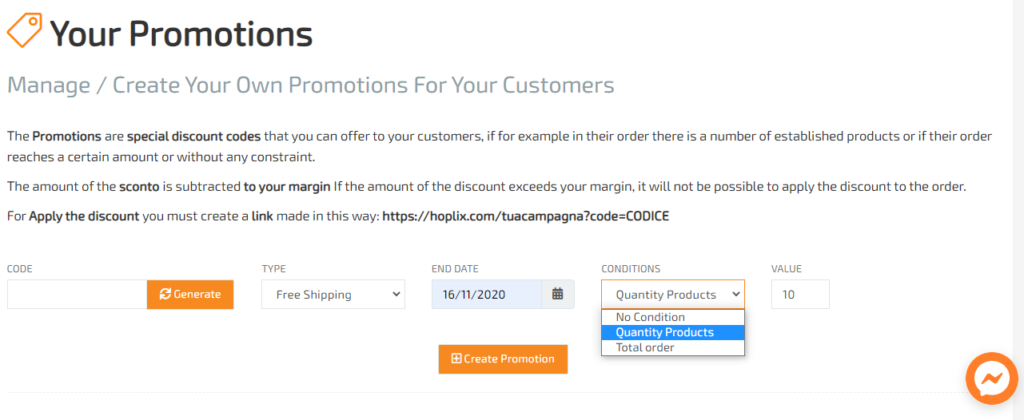
How to Create a Promotion
After clicking on Create a Promotion, a work panel will open. From here, you can choose what type of discount to create: free shipping, purchase discount, percentage.
Free Shipping
Here you can decide the end date of the promotion and the conditions: Quantity Products or Total Order. In the first case, you must enter the minimum number of products purchased by the customer from which free shipping will be applied. In the second case, you will enter the minimum amount to be reached in the order total to get free shipping. Or, you may not apply conditions.
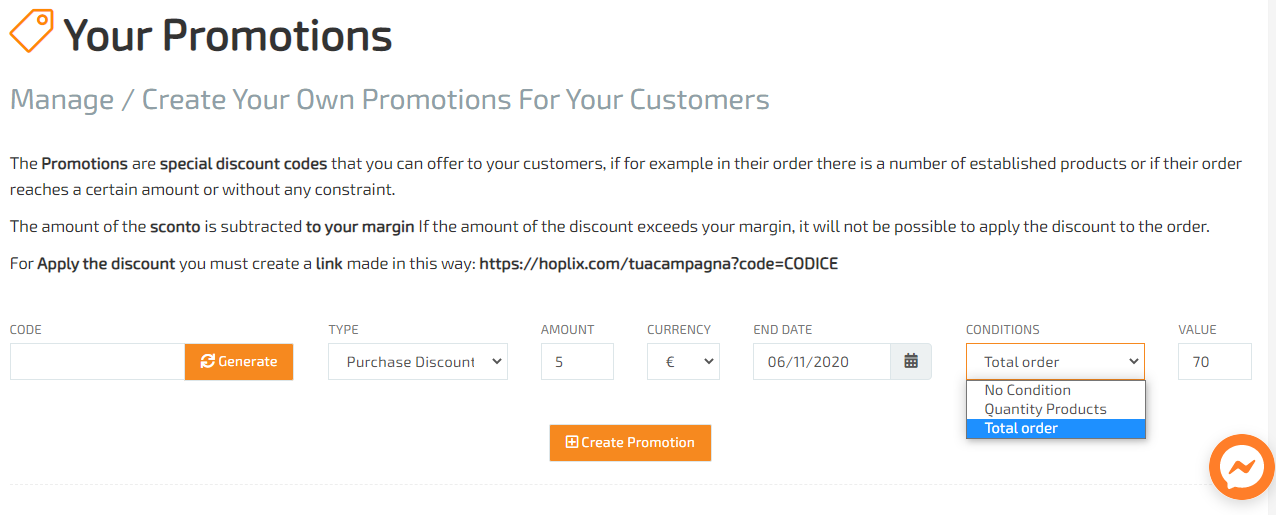
Purchase Discount
With this type of discount, you can enter the amount in the selected currency and the expiry date. Also in this case you can choose between three conditions: Quantity Products, Total Order or No Condition.
Percentage
Here you can enter a discount indicated in percentage or in euros. Here you can select one of the possible conditions as in the case of the Purchase Discount and Free Shipping.
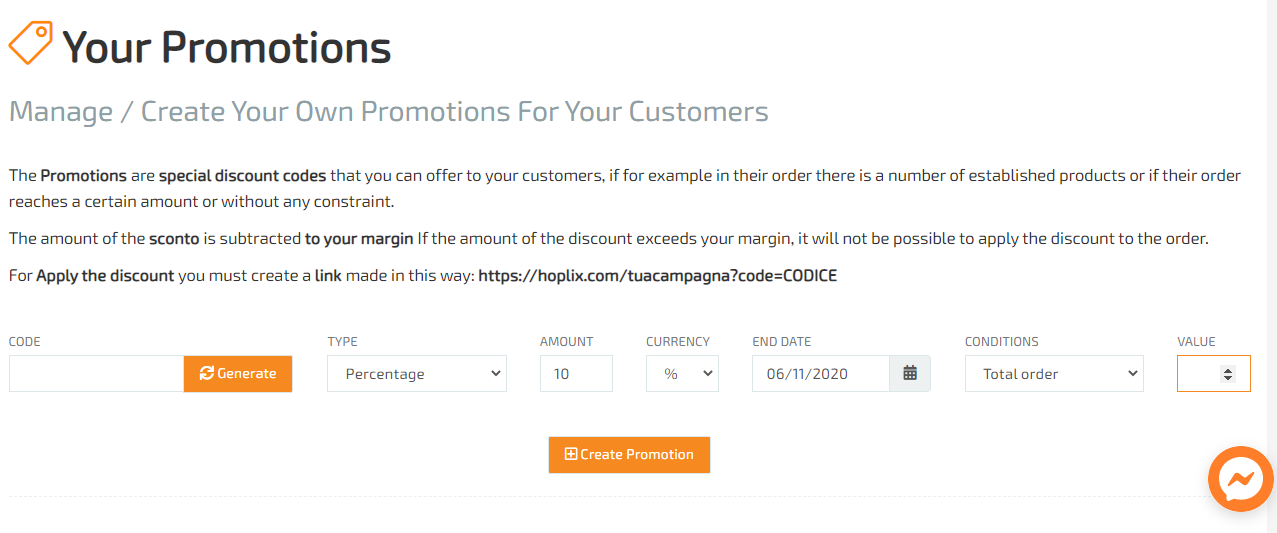
For each choice, you must always to click on Generate to generate a code. This code is linked to the specific promotion you created. In fact, returning to the Promotions menu, you will find all the codes that you can use simply by selecting them. If you want to create more stores, all your codes will be visible in each of them. To delete the discount codes, you must need to access into the Promotions menu in the left menu.
At this point, select where on the home page you want the promotion banner to appear: at the top, at the bottom, fixed at the top, fixed at the bottom. Finally, you can choose in which color the font and background of the promotion will be displayed and write the content of the personalized message that will appear as the text of the promotion.

Marketing
In this menu you have simple tools to add track codes to control views and purchases made on your store.
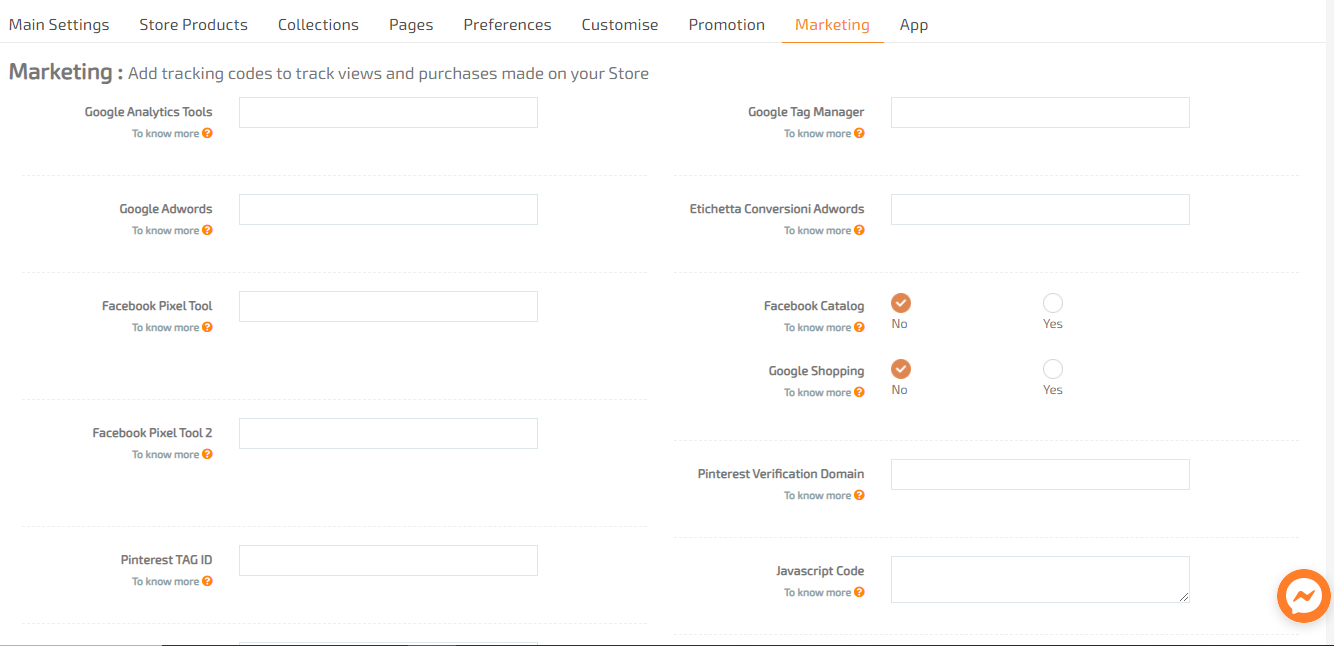
Google Analytics Tool: here you can decide whether to enter a tracking code for your ADV or use the code inserted in the account settings.
Google Tag Manager: in this box you can decide to check other tags by inserting the code and thus use the dedicated Google tool.
Google Adwords: for your Google Adwords campaigns, insert the tracking code here.
Adwords Conversions Label: to track your activities on Google Adwords, insert the conversion label code here.
Facebook Pixel Tool: insert here the tracking pixel of your Facebook campaigns. Shipping costs will be tracked.
Facebook Pixel Tool 2: for the tracking pixel inserted in this box, shipping costs will not be tracked.
Facebook Catalog: by clicking yes, your feed will be generated within 24 hours and will be updated every night.
Google Shopping: by clicking yes, your feed will be generated within 24 hours and will be updated every night.
Pinterest TAG Id: to track conversions on Pinterest, enter your TAG ID in this box.
Pinterest Verification Domain: to verify your domain on Pinterest, insert the relevant code here.
Meta-Tag Verification: to verify the domain ownership of your site (for example the Facebook or Instagram shop), insert the verification code here.
Javascript Code: insert the Javascript code here. This will be displayed in your store footer. Remember not to include the <script> and </script> tags.
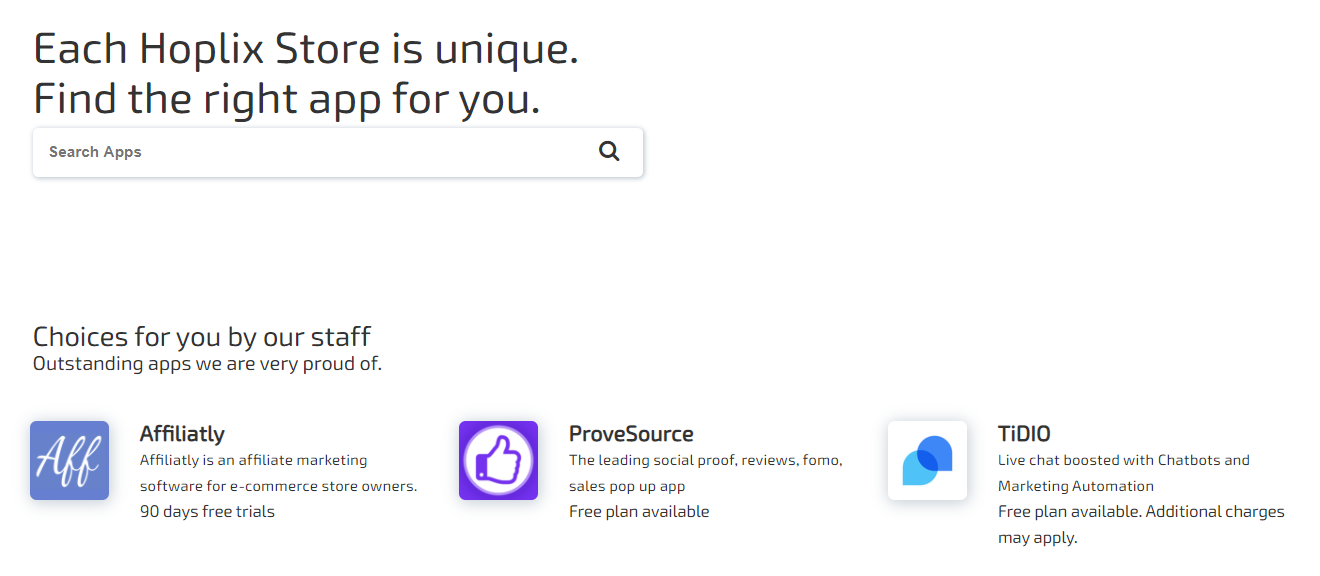
App
To install apps click on Add More Apps. From here you can search for them by name with the search tool or install those chosen by us for you.
Watch our video tutorial!